

What a nice surprise to find out my article on making felted wool ornaments from the first Quilting Arts Gifts issue is included.
There are also articles by Jane LaFazio, Victoria Gertenbach, Rose Hughes and Jude Hill, just to name a few.


 To make the ornaments shown in the 2008 issue of Quilting Arts Gifts, you need to make felted wool balls.
  Close the roving covered yarn ball in your hand and bring it to the foot of a knee hi panty hose. (buy cheap ones at the dollar store, or use those ancient ones in the back of your sock drawer) Gently remove your hand from around the ball and tie a knot with a small piece of yarn around the hose to secure the ball in place.


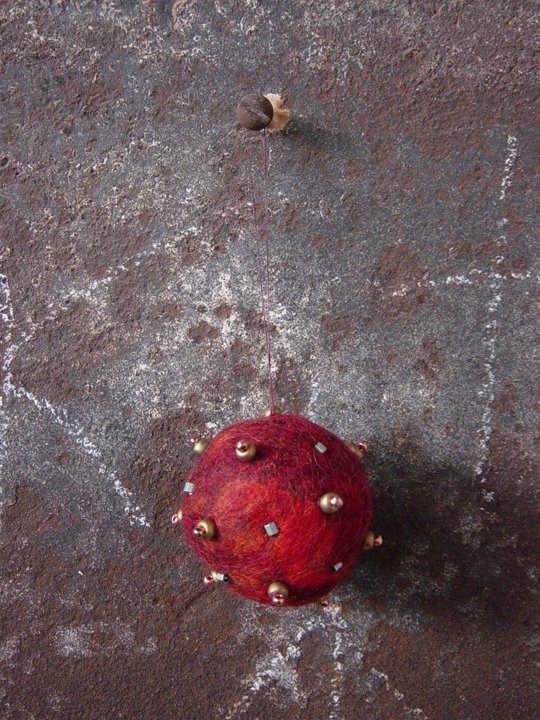
 To make the ornaments shown in Quilting Arts Gifts, you need to make felted wool balls or you can buy pre-felted balls from the Artgirlz or Quilting Arts. I like to make felted balls myself because I can have fun playing with colors and shapes. How to make the felted balls is explained in the article, but it does not have photos with all the steps. So, for all you visual learners here's how I do it.Unwind a length of roving, while holding it in one hand, grasp the end portion with the other hand and gently pull off "tufts" roughly 5-6 inches in length. Spread the fibers into a thin flat layer with all the strands going in one direction. Pull off another tuft of roving and layer it on top of the first at a 90 degree angle. Repeat this process several more times, criss-crossing 4-6 thin layers.When lifting the blanket of roving there should not be thin spots or holes. Changing the colors of yarn in the layers will create a heathered multicolored wool ball.Close the roving covered yarn ball in your hand and bring it to the foot of a knee hi panty hose. (buy cheap ones at the dollar store, or use those ancient ones in the back of your hosiery drawer that you never wear anymore) Gently remove your hand from around the ball and tie and knot a small piece of yarn around the hose to secure the ball in place.When all the balls have been wrapped in the hose, place them in the washing machine, set the water to lowest level and hottest setting. Add a small amount of detergent, about a tablespoon, the exact measurement is not crucial but soap is important in the felting process. I usually run it on a long cycle, the more agitation the better the felting. Good old fashion top loading washers have the most success with felting.These would make great cat toys but dogs will want to shred these to smithereens. My chihuahua thinks there is nothing more fun than stealing felted balls when I am not looking and peel all the fuzz off.
 50 felted balls ready to go. Come to one of my MIU workshops at International Quilt Festival Houston and stitch one of these babies into a lovely ornament.
I think we will all be making a lot more gifts this year with the present state of our economy. I don't know about you, but our budget's pretty tight these days.These have turned into the best portable project. Everything I need fits in a couple baggies. Yesterday, while at my kids teen gathering at the local coffeehouse I stitched three of these. I made one while sitting at a doctors appointment and a few more watching tv with the family. The wool is wonderful to stitch through.
50 felted balls ready to go. Come to one of my MIU workshops at International Quilt Festival Houston and stitch one of these babies into a lovely ornament.
I think we will all be making a lot more gifts this year with the present state of our economy. I don't know about you, but our budget's pretty tight these days.These have turned into the best portable project. Everything I need fits in a couple baggies. Yesterday, while at my kids teen gathering at the local coffeehouse I stitched three of these. I made one while sitting at a doctors appointment and a few more watching tv with the family. The wool is wonderful to stitch through.
 Following up several other blogsters that have been showing their creches, this is the creche I made with my daughter about 12 years ago when she was 4. We made it out of sculpy.


