Thursday, August 30, 2012

Aloha! Grab your grass skirt and let's paint all the way to Hawaii!

This is so exciting, I want to invite you to come along with me for a surface design painting adventure on an island hopping Quilt n' Cruise to Hawaii. Linda Poole, Joan Shay and Lisa Erlandson will also be teaching on the cruise.

The ship leaves port from San Francisco October 4th. The next 4 days at sea offer a great line up of classes, then the ship stops each day in Kauai, Honolulu, Lahaina and Hilo, then 4 more days for classes before stopping for a day in Ensenada and docking back in San Francisco the next morning, October 19th.

We are going to have a blast, all skill levels welcome. Look at what we're going to do:
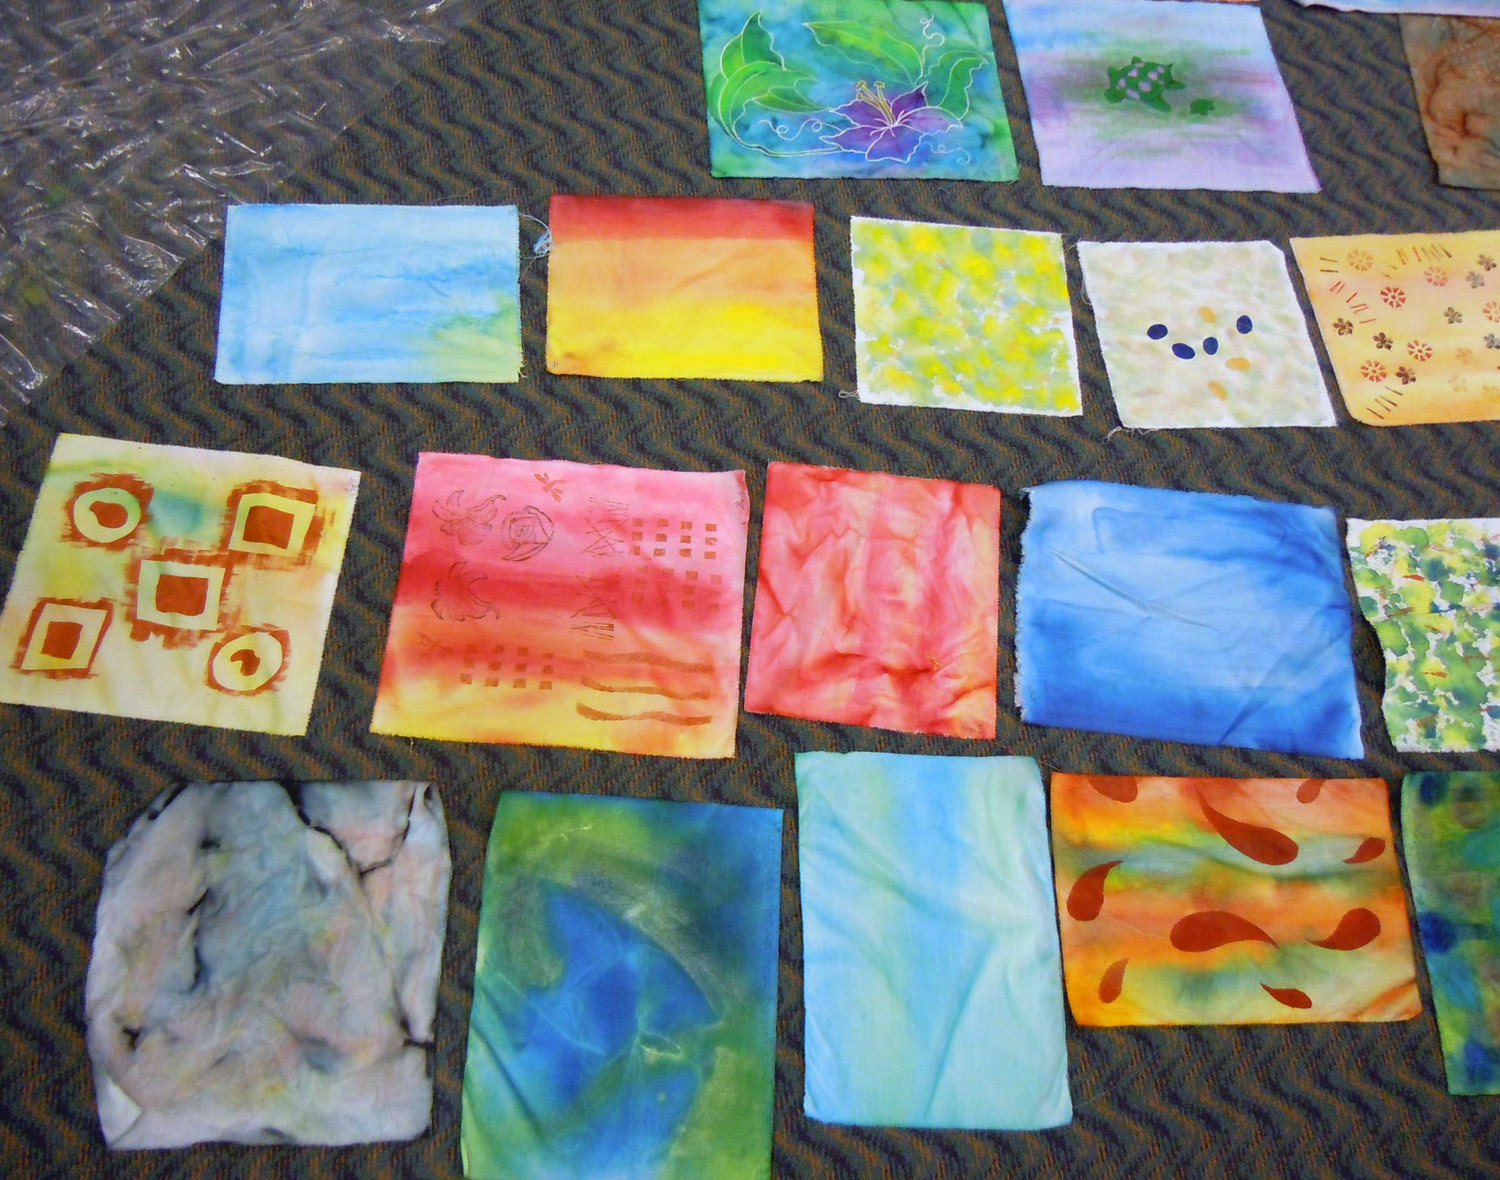
Surface Design 101
Learn about different textile paints while creating unique, textured fabrics to use for art quilting or as a base for other mixed media techniques. A few of the methods we’ll explore are shibori and scrunching, working with sea sponges, layering translucent washes, creating texture by relief and working with a variety of brushes.


Make your Mark
Begin the class by designing and carving your own rubber stamp and foam stamp.  Then explore mark making by printing with your new stamps, wood block stamps, stamps from home, thermofax screens and quill pens to create beautiful stamped and painted fabrics. 


Heavy Metal Play Day
Spend a day working with craft metal and discover a variety of ways you can add flash to your mixed media projects.  

Each student receives a metal tool kit courtesy of Walnut Hollow, and learn multiple embossing techniques to create beautiful designs with dimension and texture on aluminum and copper metal.  Several methods for enhancing metal with color using alcohol inks and markers will also be explored in this fun and relaxed class. 

Painting Hawaiian Flora with Textile Paints
Using native Hawaiian floral imagery, learn how to paint fabric with textile paints, using an original design of your own or one provided in class. Students learn techniques for creating smooth gradations of color, glazing paint with textile mediums to create more visual depth, covering large areas with even color and avoiding blotchiness, control paint bleeding, working with freezer paper masks, and painting smooth lines and fine details.  

We will also discuss how different paints affect the hand of the fabric, and how to baste painted textiles for quilting. This is an information packed class geared to help students gain confidence painting fabric for art quilting. Students will have a variety of images to choose from or may work from their own designs.

How Can You Resist?
Explore the art of using resists to create beautifully textured painted fabric, while working with a variety of inexpensive items commonly found around the house or the local office supply.


Painting Hawaiian Fauna with Textile Paints
Using birds, insect or animal imagery native to Hawaii, learn how to paint fabric with textile paints, using an original design of your own or one provided in class. Students will learn techniques for creating smooth gradations of color, glazing paint with textile mediums to create more visual depth, covering large areas with even color and avoiding blotchiness, control paint bleeding, working with freezer paper masks, and painting smooth lines and fine details.  


So grab your partner (or not), and come spend two fun filled creative weeks immersed in color, texture and fabric. Check out all the details so we can go try some Spam sushi!

Tuesday, August 28, 2012

How Long Does It Take To Bind A Quilt?

Evidently for me, a traditional quilt binding can take 9 years, lol.

I don't make many utilitarian quilts and I've never liked sewing traditional quilt bindings, but I made this 'modern' quilt for the bedroom we renovated in our house in Austin Texas almost 10 years ago!
Front                                                                                    Back

Shortly after the room in Austin was finished, we moved back to Los Angeles and 2 years later we moved to Chicago. I guess with all the work of moving and resettling twice in a fairly short period of time, I kind of lost steam and forgot about finishing the quilt.

I decided, it was time to finish the quilt before I pack it up and was shocked when I counted how many years that quilt has been without a binding.

I look forward to sleeping under this quilt in a few months when I get resettled in Northern California!

Saturday, August 25, 2012

Gimme Shelter

The symbolism of home and shelter is very significant to me right now. I am on the cusp of a major life transition, and home, as I am sure I will have some form of shelter as I go through this, is a bit ambiguous right now.

My marriage of more than 20 years came to an end a few years ago and because of the bad economy I remained in Chicago with my (now adult) kids, unable to sell our loft. I am in the process of negotiating a short sale and crossing my fingers it all goes through, which will allow me to move back to California in the next month or two.


I made this house for Kathy York's curated exhibit the Artists Village about a year after my initial split. My house incorporates floral/plant imagery for growth, bees for hard work, a heart for healing and love, 


roots for staying grounded and figuring out where to plant myself and even a couple of female nudes to represent rediscovering what it meant to be a single woman again.
My finished house is about 10 inches tall.
This was the house that started it all, The Cicada House is about 20" tall and 6" wide. The fabric is layered with printed paper imagery and multiple layers of transparant and metallic textile paint, then fused to heavy weight interfacing and quilted. The panels were stitched together and the roof and windows were embellished with embossed metal trim.

I enjoyed making the cicada house so much I needed to explore the house construction further with a couple water themed houses which were featured in a two part tutorial in Cloth Paper Scissors magazine March and May 2008.

I've also done a series of houses with stitched painted imagery with embossed metal stitched to them that I like to think of as personal altars. Bees and hives are symbolic of industry and craft, so I like to have them in my work.


This house series was painted and quilted fabric stitched to painted and hand stitched lutradur with embossed metal stitched to it, sewn to copper screen.


I know there will be more symbolic houses incorporated into my art in the future as a I transition to a new life living in Northern California as a single woman, with kids embarking on adulthood while I explore new forms of shelter.

Tuesday, August 21, 2012

Prepping fabric

I have so much on my plate that I have very little creative time right now, but I did pull out paint and fabric to prepare for my next teaching gig in Springfield MO for the Ozark Quilters show next month. It was a really nice break from paperwork, computer time and purging.

You can see the paint is pulled to the top of the creases in the fabric. The fabric on the bottom against the plastic is the lightest, staying damp the longest. Many times I turn the fabric over when the top feels dry, to further dry the underside, but also to encourage a little more creased staining on that side.

This method works great for more contrasty stained fabric with very light overall areas and darker creased stains. For a more overall colorful fabric (like this purple one) brush straight paint or a less diluted solution on damp fabric with a paintbrush, then crumple fabric to dry. 
Once it's dry it takes some serious ironing to get all the wrinkles out, usually requiring extra steam or spritzing with water while ironing.

Click here for a photo tutorial of the process. 

Tuesday, August 07, 2012

A Sea of Colorful Fabric Using 10 Techniques with Acrylic Inks


This was the scene on the floor before we broke for lunch on Saturday. Luckily we had a really big room. I spread out a 9' x 12' tarp and then added another 6 feet to it an hour later. These were our base fabrics created using the first 5 techniques. 
After lunch we used this fabric to work through the next 5 techniques.


It's a pretty action packed class to get through all 10.


It would be great to do this as a 2 day class working at a slightly more relaxed pace with more time dedicated to each technique, then have the second day to incorporate all the techniques into one larger piece.

And for those students in my class that were interested in the beautiful wooden block stamps we used, as well as all of you reading this post, they are from The Indian Block Company. I'm fairly certain the company Colouricious will have a booth selling them at International Quilt Festival, Houston this fall.

Everyone was very productive creating a lot of unique fabric and most importantly had a lot of fun doing it.


Monday, August 06, 2012

But Where Are All The Martians?

Well, it's very exciting that the Mars rover Curiosity has landed with newer high tech equipment ready to beam us back some new pics of the Martian landscape, but my guess is it's still going to look a bit stark.

I made this quilt after the first rover landed on Mars in 2004 and all the photos showed a barren rocky landscape. I prefer thinking of Mars as depicted in 1950's B movies with sexy Martian ladies and crazy carnivorous life forms.

Do you think we'll get anything more exciting to see this time around?

Sunday, August 05, 2012

Charting a Course in Color

I teach color theory very much like you would learn it in art school, because I think the way to really understand color is by mixing paint and seeing what happens when you physically add one color to another. As an educator I believe experiential learning like this creates the deepest level of learning for most people.

In the first half of the class I show a power point explaining the various terms relating to color theory with graphics and going through all the color schemes with fabric swatch examples along with samples of my art quilt work that falls into the various categories.


One of the first charts we make is a basic color wheel with primary, secondary and tertiary colors created from red, yellow and blue.

It's funny how every class has an over achiever, who takes the project to a higher level than required :-)

Actually this gal is a fabric dyer who wants to really understand how to attain exact colors when mixing dyes.

I think she's well on her way.


After lunch I show another powerpoint with examples of how colors interact and affect each other so that one can choose colors to enhance mood, visual activity, depth and contrast. Then we get on with our next charts.


This is exercise is mixing complimentary colors, one of my favorites! I love the beautiful color palette you achieve when doing this, look at those gorgeous greens and browns made from blue and orange.

The class has 6 charts in all, we usually get through about 3-4 in 6 hours, but everyone has the experience they need to continue at home.

I teach an online version of this class too, but right now the class is on hold until after I move later this fall, am resettled, get a new web host and have the site up and running again.

Linda took my Tea & Ephemera class last year and brought in this fantastic pillow she made with her collaged fabric, it's backed with a rust colored ultra suede.


Beautiful!

Friday, August 03, 2012

Alternatively Bound and Stitched in Long Beach


There are always a few things I learn teaching a new class, like if I've forgotten to put something on the supply list or how long will it take students to go through each part of the class within the 6 hour time frame.

With sewing machine based classes at conventions, it always takes a little extra time as well when students are working on machines they're unfamiliar with, that said the Bernina 550's were a dream to work on and everyone got the hang of them pretty quickly.

The main thing I learned was making quilted samples as big as 12" x 12" were a little too big to finish before lunch. Luckily we had a 2 hour lunch break and since the show hadn't opened yet, students could take the extra time to finish.

Everyone did a wonderful job with the three different binding techniques in the afternoon.

From now on I'll have students precut fabric and batting and work on smaller samples in the morning and the timing should work out just right.

Wednesday, August 01, 2012

International Quilt Festival Long Beach Pre-show Set Up

It was so nice to be back in Southern California for another Quilt Festival. This is the lovely view from our hotel window at the Hyatt.


Here's what the convention center looks like the day before festival opens. It is amazing how it all comes together in a relatively short period of time.

That's a lot of lightbulbs!
6 of us hung the 'Rituals' exhibit organized by curators Jamie Fingal and Leslie Jenisen. Each quilt is
2' x 5' and will travel to each International Quilt Festival venue over the next year, including the newly added Chicago location.
the hanging crew: Leslie, Me, Julie, Jamie, Sherry and Peggy


Leslie, Jamie and I volunteered to put up the Artist Village exhibit curated by Kathy York. The platform was longer than the exhibit so we decided to put the quilt on point and rearrange the houses, what fun we had doing that.


Stay tuned for posts from my classes.

LinkWithin

Related Posts with Thumbnails