
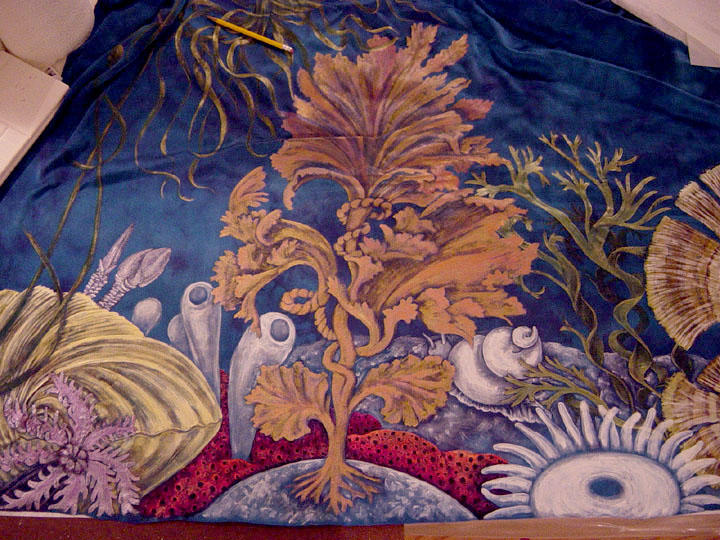
 I wanted to use silk because of the luminous way light reflects from it. I thought it would be ideal for water. I ordered the widest silk charmuese I could get from Dharma Trading and sewed two pieces together to make a 6 foot by 8 foot wide piece of silk. Then I hand dyed it twice in shades of turquoise, cerulean and navy. I tried tracing my design on to the silk using a light box but found the blue to dark to see through. So I re-taped my fabric under my design and used white Saral transfer paper to transfer the images down.
 Then I began to paint and found out two things. One- silk stretches and two- translucent textile paints turn black when you paint on blue silk. To solve the first problem freezer paper became my best friend. Each time I painted an area I had to iron a strip of freezer paper to the back of my fabric. Then I had to be careful to paint up close to the edge of the paper and stop, reposition the freezer paper adjacent and just underneath the area I was painting so I would not get a line from the paper showing up in the paint. Any little bump or grain of sand will show up in your painting if it is under your fabric.
To solve the next problem I painted each image in shades of white to create a base for the paint colors.
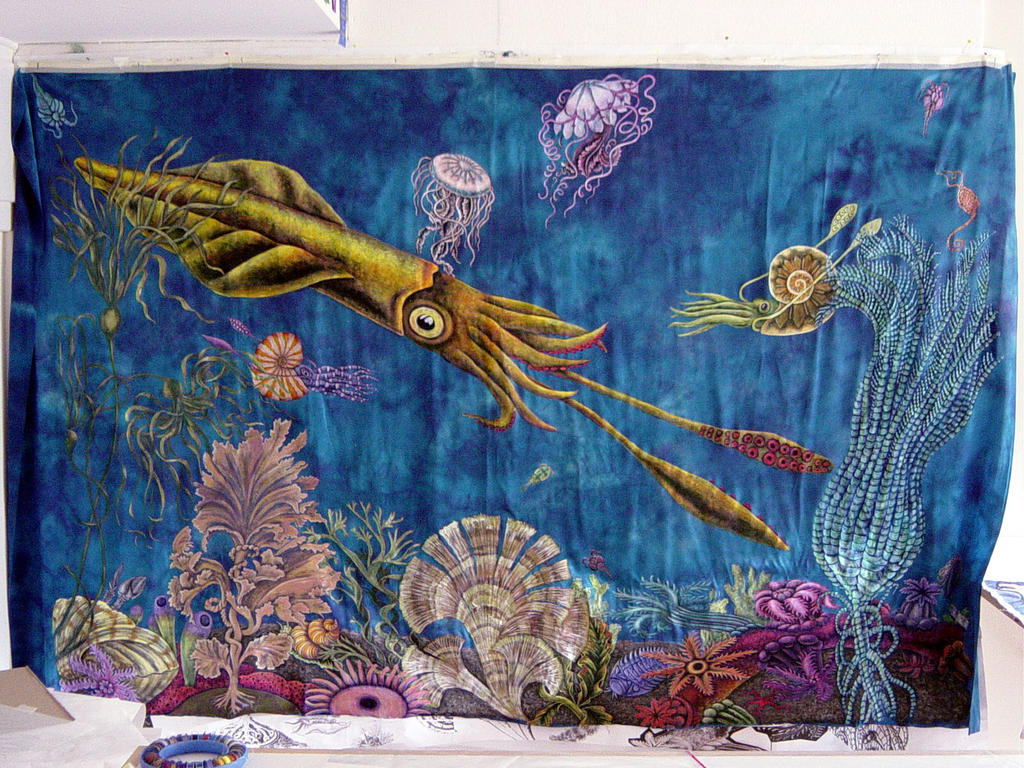
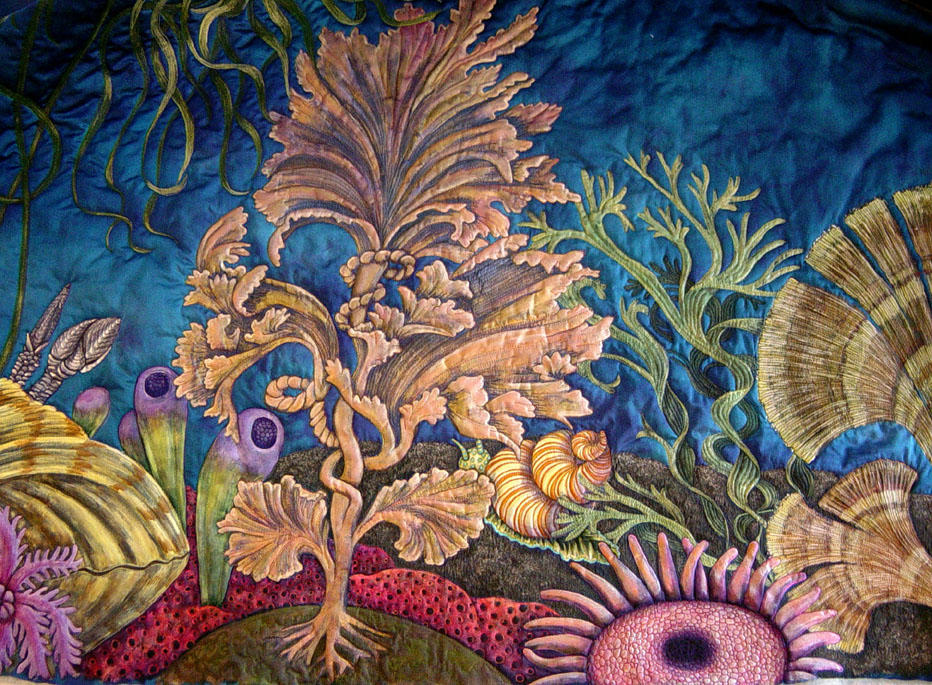
 The next problem i ran into, was the chalk lines from the saral paper started to disappear on me, and i found myself having to rely on looking up at the original on the wall and re drawing things by hand because there would be no way to line it up again and re transfer the images. So things changed shape sometimes and got different kinds of details. This is also when I started to add in things that were not in the orginal drawing, like several more types of seaweed and sponge, a large pink anenome, a trilobite, clam and a snail.
 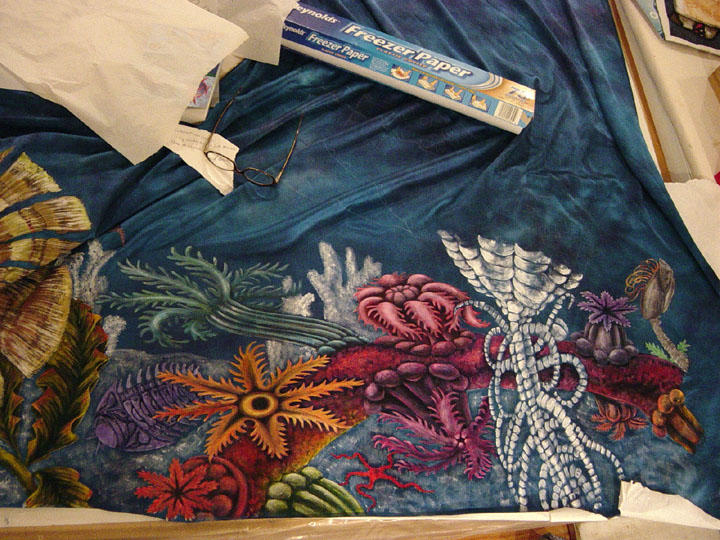 You can see the lines for the giant sea lilly have all but disappeared.
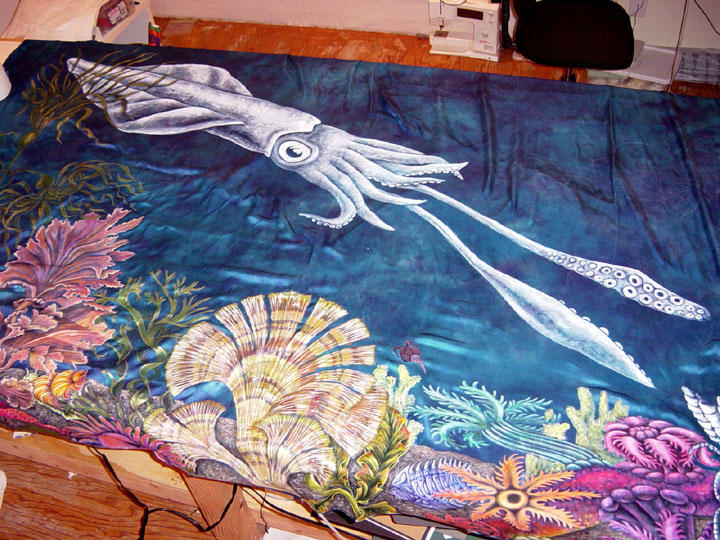
Finished Painting.
I was terrified to quilt this quilt. One it was big, two I was using slippery silk and slippery wool batting, and three any mistakes in the quilting (puckers in the fabric, stitches that need to be removed) were really going to show. I thought of spray baste, but was afraid of its effect on the silk, then where would I be able to lay silk outside safely to spray, and after vigorous manipulation while machine quilting, it may loose its adhesion. Hand basting seemed too daunting on this one. Then I thought of fusible web. Something I am ambivalent to use because I do not like the stiff flat quality. Wool batting has a lot of loft and you would lose all that texture by using something like wonder under. I remember Esterita Austin saying that she had a new fusible web that was very light. So when she came to teach at our Glendale Quilt show I bought a package.
I made a sample using Esterita’s fusible, sandwiched between a piece of silk and the wool batting and loved the results. The fusible is like a spider web it is so light. So I fused the whole hand dyed and painted sheet of silk to the wool batting, very carefully in two steps.
First I fused the web to the silk in rows, it is 10” wide and i used parchment paper as a backing sheet. The slight overlaps were invisible after fusing. I then fused a one-inch square of web every 6 inches to my hand dyed cotton backing fabric. I fused this to one side of the batting. Next I spread the spot fused backing and batting on the largest carpeted floor in the house and carefully fused my silk top to the wool batting starting in the center and working outwards. Thank goodness I had recently bought a cordless iron. This took hours, but it was well worth it. The fusible held up like a dream under heavy machine quilting.
When I start my quilting, I always try to think about how my stitching lines could enhace the object that I am quilting. What kind of detail can I add. How can the quilting make the object appear more dimensional or textured.

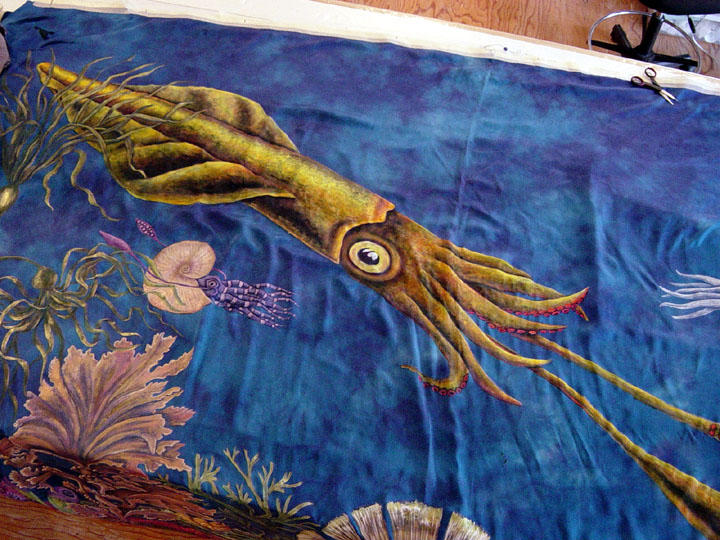
You would not think thread would make such a big difference to the work when you are doing the quilting. But look at the difference in the quilted fin of the squid and the unquilted one. The quilted side is so much richer.

While discussing the quilting of the water online with my art quilt group, Vickie Hallmark mentioned putting plankton into the quilting. What a great idea! There are lots of little plankton hidden in the quilting of the water all over the quilt.
 Quilters always like to look at backs of quilts. For a long time I thought that was kind of strange. But I kind of get it now. It is fun to see the picture with out all the color, and see all that crazy quilting.
I hate doing labels, so I thought I would try and have more fun with this one. It is painted and quilted.
Dear Judy:
ReplyDeleteI adore, no, love, no, swoon over your exquisite, marvelous fantastic quilt! It is glorious and perfect. What a stupendous work! ( did I get enough superlatives in there?) I really enjoyed the step by step, and it isfascinating to see how you solved all the technical problems so wonderfully. Wow. Congratulations! Thanks for sharing it...wow.
Judy, thank you for taking the time and efforts from your day to explain behind the scene of these 2 quilts.
ReplyDeleteWelcome to the AQ ring!
Incredible work Judy! Thank you for sharing your process. Fascinating.
ReplyDeleteYour work is remarkable -- color, design, humor, quilting! To repeat Caitlin's thought, I am also even more awestruck than when I first saw this quilt.
ReplyDeleteThis is an AMAZING quilt!!! Thank you so much for sharing the process with us!
ReplyDeleteThis is so beautiful.....
ReplyDeleteYour quilt is awesome!
Judy...thanks so much for sharing the many details with us.....I think I learn as much from your descriptions as from a class.....I'm eager to try working on silk, especially since you solved the "shifting on batting" problem with Teri's Misty Fuse.
ReplyDeleteHope I get to see this one in the cloth! Cheers and thanks, Sarah
www.sarahannsmith.com
thanks for such great feedback. I am glad that what I have shown here is so helpful. Lately people have been asking me if i teach. So far i only teach my children, we homeschool. I think I would like to teach in the future, I keep trying to figure out what is it that people would most like to learn from me? I would love to hear any ideas.
ReplyDeleteHi, Judy The Lady from Mars had me in stitches! (pun intended) Nancy told me about your site and so I came by to look--I liked several pieces immensely--notably plum wine and green tea and the middle lichen one, with no title in earth tones and with red. They probably look really stunning in 'person'. Congratulations on fine work!
ReplyDeleteJudy,
ReplyDeleteYou remain a constant inspiration. Thank you for your sharing generosity. Please keep your blog going. It will be wonderful to be able to follow your star.
Linda
So much inspiration from one website! I thank you from the bottom of my heart.
ReplyDeleteSue T.
beautiful and welcome to chicago!
ReplyDeleteI look so forward to seeing this at the IQF
Hi Judy,
ReplyDeleteI'm your mother's friend Becky from first grade. The quilt was delightful as was your description of making it. It was fun to look at past quilts and believe I saw some of them before either in mom's photos or at your sister's. Congratulations on your win. It should have taken First.
I have been taking quilting classes at Quilter's Marketplace in DelRay Beach FL. Marilyn Dorwart (the owner) was one of the judges when you won in Houston I think two years ago. I'm in Florida in the winter.
Mom wrote to me about your loft. It was fun to see. Good luck with the space and your new home.
Becky
Exquisite work, I'm totally inspired. Great step-by-steps on both of these, too - I love seeing how people solve issues that crop up and get out of corners they painted themselves into.
ReplyDeleteThanks so much for your generous notes on process. The mechanics you described seemed very challenging, and your wonderful masterpiece is the reward!!
ReplyDeleteCarole in Maryland
This comment has been removed by a blog administrator.
ReplyDeleteThank you for sharing your creative process for this fabulous work of art. You have helped me see that courage is another necessary ingredient for an artist. I would love to see this quilt in person, since it looks so beautiful on my monitor!
ReplyDeleteSue,
ReplyDeleteThis quilt will be traveling to several of the Mancuso shows this year as part of the Chicago School of fusing exhibit. So if you happen to live in an area near one of these shows, you might have the chance to see it. It is going out to the Denver show this week.
wonderful wonderful wonderfu
ReplyDeleteThank you for the detailed descriptions of this piece.It was like a mini-class in quilting on silk. I left you a comment on the Quilting Arts web site, but had no idea that that piece is as large as it is. My largest piece to date has been about 5' across, but was hand quilted and beaded, so much easier to avoid mistakes in the quilting. Very, very impresive!
ReplyDelete