Showing posts with label FW acrylic Inks. Show all posts

Monday, June 18, 2012

Get Inked in Long Beach!


Wow! It's four weeks until International Quilt Festival, Long Beach. Would you like to immerse yourself in color by learning how to paint fabric with acrylic inks?

Saturday I'm teaching a fun new class 10 Techniques with Acrylic Inks.


Spend a day filled with fun and relaxed exploration, beginning with creating colorful textured backgrounds

exploring mark making with different kinds of stamps 


and drawing with inks using quill type calligraphy and ruling pens.


We'll explore layering imagery with color and marks


cutting masks with freezer paper.
And painting in a transparent watercolor style.
This class is going to packed with lots of tips and ideas of ways you can work with these versatile inks on fabric. I'd love to see you there!  
Click here to see student work from the first inks class.

To see two art quilts painted with acrylic inks check out these step by step blog posts about making 8 of Cups and Black and Bloom All Over.

Thursday, May 10, 2012

Painted ipad Bag

I have been wanting to buy a case for my 'new' ipad, but have held off because I read the ipad 2 cases didn't work with the new ipads because they moved the magnet that puts it in sleep mode when you close the cover and there aren't that many options in covers for the new ipads yet, so in the mean time I've had nothing to protect it when I'm not using it and need to transport it.

I decided to sew a simple bag from canvas with a piece of thick wool felt sewn into it as a cushioned liner. I had no intentions of doing anything fancy, just a simple temporary bag that was purely utilitarian. This did the job and suited me just fine... for a few days.

But the lure of that blank canvas was too much.
I pulled out a few printed tea bags, abaca paper and matte gel medium and glued a few images down.
Then I painted a layer of clear gesso over the whole bag. Gesso is a way to prep the canvas for paint and clear gesso would not cover the printed images the way white gesso would.
Using acrylic inks, I brushed on some random color. When I build up layers of painted imagery, I like to start by putting down some primary colors, mainly warm yellows and cool red, because when I paint blues over them I'll get greens and purples. I especially like yellow as a base color because it is light, bright and transparant and I can always go darker with layers of color over the top.
With pencil I drew a few images on the canvas, white pencils are always nice if you can't see pencil lines very well.
Then I painted the background with deep blues and turquoise. You can see some of the colors are translucent letting the printed images and color from below show through and some of the colors, like the turquoise, are opaque.
 I used a black sharpie to give more definition to the simple graphic shapes

I still havent decided on what kind of closure if any I'm going to put on the bag, for now I just fold it over and that works fine.


Thursday, May 03, 2012

How Can You Resist Such a Simple Technique?

One fun little technique I found works great with acrylic inks (this would also work with Tsukineko inks) is to draw on fabric with a colored pencil or china marker and paint over it like a simple resist. Kind of like in grammar school when you colored with crayons and painted india ink over the top.

So why pencil versus china marker? Simply, pencil will give you a thinner defined line and the china marker a thicker heavier line.

In this case brand does matter. The first sample, if you can see it, was written with a Blick store brand white colored pencil and the second was a Berol Prismacolor white pencil. The Blick pencil was not as creamy and waxy and did not create a very good resist, the ink painted right over it.

If you are unfamiliar with china markers, they are a pencil that can write on a non-porous surface, like plastic, glass or metal and then can be wiped of with a firm rub with a dry cloth.
You don't sharpen them, instead you peel back the paper wrap covering by grasping that little string and pulling it back to the first perforated row
 grab the paper, unwind it
 then draw.
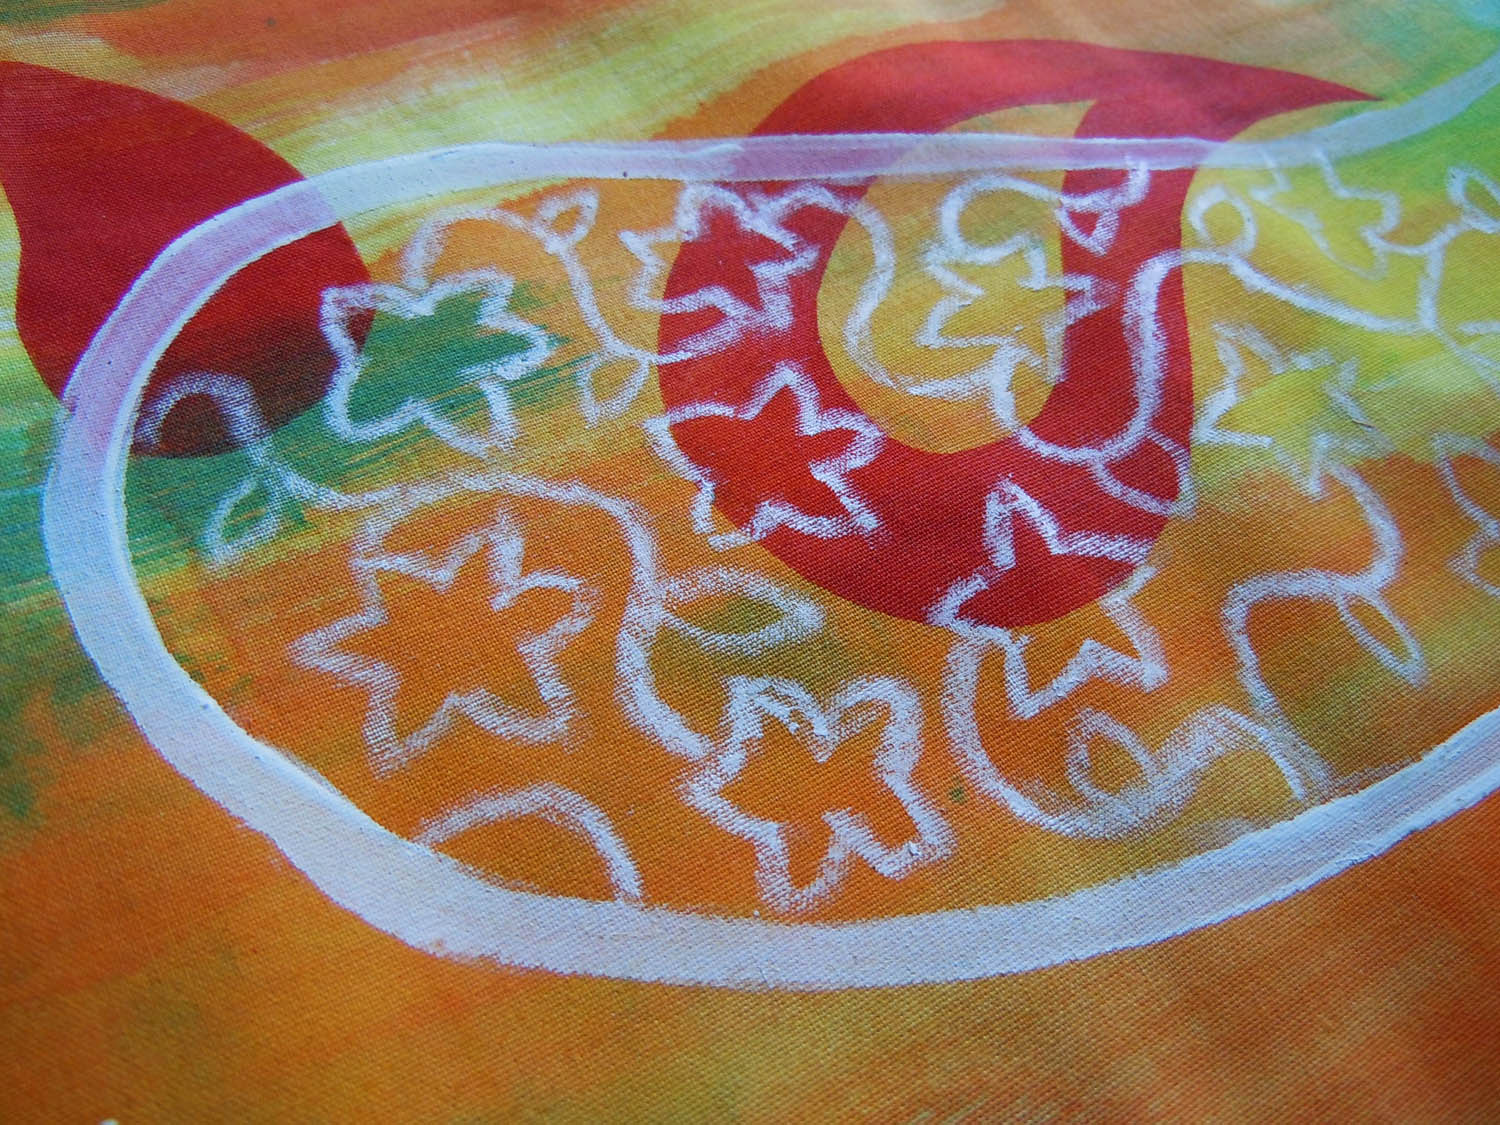
This is a sample I worked on in the acrylic inks class, layering up multiple different techniques.
The thick white lines are textile paint, the thinner flower vine pattern in the center of the paisley is china marker.
The little pale blue crosses in the background were also drawn with white china marker and then painted over with blue ink. I like how they show up really well and have a hint of blue.
I painted over the center of the paisley with red ink.
The pencil does not penetrate the fibers like a gutta resist, so if you have a lot of ink on your brush and the fabric gets really wet it will bleed beyond the pencil lines, but the white lines of the drawn imagery will show through, which to me is the effect I really like.
I painted inside the flowers and leaves with red-violet ink to make them stand out more. The benefit of the china marker was that I could quickly add color without being too fussy and neat because it kept the ink fairly contained.

Voila!

Saturday, April 28, 2012

10 Techniques with Acrylic Inks


We had a great time with the acrylic inks class, this was the first official time through it so there is always so much to learn, for all of us. I'm glad it was a small class, I can see where timing will have to be adjusted for a big class, as well as needing space to put wet fabric. 


We did start to run out of time when it came to drawing on the fabric with calligraphy and ruling pens, so there aren't any samples showing that, but I did demonstrate it, lol.


Now that I've gone thru it one time, I could see this class working well as a multi day workshop with one day spent covering all the different techniques and then the next day combining them into larger complex cloth.


We were just getting to scratch the surface with combining and layering multiple techniques by the end of the day.
 All in all, it was a fun day.

Monday, January 23, 2012

8 of Cups - finished

After the quilting was finished, I marked out the finished size: 24" x 60", sewed a tight straight stitch just inside the marked line, then trimmed it to size.

To finish the edge, I chose 3 different cords that picked up the colors in the quilt and used them to make a couched twisted cord binding.

DETAILS


LinkWithin

Related Posts with Thumbnails