Pages

Friday, November 28, 2008

Dyeing Batting with Rit

Now that my article on low immersion dyeing with RIT from the December 2008 Quilting Arts magazine has been published, I can show you photos of the artwork I made for RIT to use on a segment of Quilting Arts TV for season 3. The third season should begin in January. The episode that RIT will be on also happens to have the segment that was taped in the spring at Quilt Festival Chicago where I demonstrate making Fiesta Ornaments.


These circles are cut from dyed Warm and White cotton batting and stitched with a blanket stitch on the sewing machine. If I had an easier time with hand work I would have loved to do all the stitching with embroidery floss to really make the stitches stand out. Dyed batting can be like a cheaper softer substitute for doing wool appliqué.

I think dyed cotton batting would make a great substrate for needle felting. I can imagine a whole landscape made from pieces of dyed batting and embellished on a felting machine with ribbons and roving for trees and flowers.


You can see the back of the 9 patch is one piece of dyed batting cut with a prairie point style edge. I used a leftover block cut in half on the diagonal to make the corners for hanging, with a piece of painted balsa wood to rest on a nail in the wall. This is a super easy way to hang small fiber art.

On the left is a detail from the abstract piece at the end of the article. The wavy lines of color running down the center is the dyed fusible interfacing. This is the soft nylon interfacing that is usually meant to be used with knit fabrics.

Below is a detail from the flower piece. The flowers and leaves are cut from batting and the centers of the flowers and leaves are fusible interfacing.


Tuesday, November 25, 2008

Embracing my inner silver and knitting berets

I hate dying my hair! I know it is probably the easiest way to hold on to that illusion of youth, but the earth mama that resides within me has always hated the maintenance and the idea that toxic chemicals are being absorbed by my scalp.

I have been dyeing my hair for at least ten years. I began dyeing it because my complexion looked really washed out when those stray gray hairs started growing in. For several years I dyed it myself but then the store bought dyes just did not cover the gray and I had to put my hair in the hands of a professional. As our budget became increasingly tighter this year I felt bad seeing such a big chunk going to my hair.

Before I made the final decision, I Googled "going gray" and came across this website and this blog. I was amazed to see that most of the women really looked better after they had gone gray. I think what is key, is having enough white so it doesn't look steely. It looks like I am pretty white in some places and streaky gray in other places, so I think I might be ok.

Of course my biggest fear about going silver is that I will suddenly look 20 years older. My son told me he thought if I went gray Silver people would no longer mistake me for 10 years younger, they would just think I looked good for my age. That boy is pretty smart for his 15 years. I am trying to envision that all that silver is going to show my "wisdom" instead of my age, lol, so I am crossing my fingers and knitting berets to ease myself through this transition.

In my internet search for cute beret patterns I came across a couple that I really like. The first one I knit was the Gwen Slouchy Beret this is an easy 4 row lace repeat that looks great knit in a variety of yarns.
The first one I knit with Knitpicks Comfy in Seafoam, knitting the pattern with 6 inches of repeats. I love the beret but it feels pretty slouchy, so I tried a few more with less repeats.

The red/orange beret and the purple one are knitted with my friend Emily's gorgeous Sophie's Toes sock yarn. I wore the red one a lot in Houston hiding not my horns as Kristin alluded to, lol, but my silver roots. I love the way Emily's yarn knit up a lightweight beret that could be worn year round. For these two berets I knit the lace repeat for 5 inches before the crown decreases. It has the perfect fullness for my taste.
This white one is knit with Cashmerino, it is so snuggly soft and warm, perfect for this cold Chicago weather. It sort of reminds me of a bleached sea urchin.
I found another pattern that I liked too. It is the Grace Lace Beret, I knit this olive green one with Knitpicks Shine Sport Leapfrog. I am not sure I knit the decreases quite right since it is a bit rippley but it knit up really fast and I really like the star design that happens on the crown.

Tuesday, November 18, 2008

Don't let tight finances keep you from making art

Many of us are spending a lot more time at home these days instead of going out for dinner, shopping and movies, so what are we going to do with this extra time that has suddenly come upon us besides vegging in front of the tv?

Make stuff!

Making art can be the best therapy for stress there is, we can work out our fears, lower our blood pressure, create new visions of our hopes and dreams and make gifts for our loved ones steeped in our creative blessings.

We are living in times that feel uncertain and frankly a little scary. With tight budgets many of us are feeling guilty spending money on ourselves or on anything that is not an absolute necessity.

There are several ways to make your craft dollar go further, here are a few of the things I do:

Use plastic dairy containers for rinse water and the lids make great paint palettes too. When finished painting, let the leftover paint dry on the plastic lid, the next time you are ready to work peel off the dry paint in one piece. If there are spots of thin paint stuck in a few places, rub the piece of dry paint you have removed over the paint like an eraser, it will pull up any remaining paint off the lid.

Buy textile paint with a friend(s).
8 oz. bottles of textile paint offer a big savings compared to small 2 oz jars.

You can buy large jars of Lumieres and Neopaque paints here.

Split up those big bottles of paint and store in 2 oz plastic bottles with flip tops. Don't forget to use a Sharpie to label the bottles with the paint names.

Paint in a squirt bottle makes it so much easier to put the desired amount of paint onto the palette. You will waste less paint when you can control how much comes out, I have poured out too much paint from jars so many times.

Buy reasonably priced synthetic paint brushes. Robert Simmons makes a good quality inexpensive brush for acrylics, I often buy this brand for smaller round and flat paint brushes. For large flat brushes I often buy the Da Vinci Junior student brushes.

Take care of your brushes so they last longer. Be sure to clean your brushes well with a bit of dish soap when you are finished painting, to remove any paint lodged at the base of the bristles. Do not leave brushes bristle down in the rinse water when not using, it will bend and ruin the points.

Buy pfd cotton sheeting for painting and dyeing at affordable prices.
Silk Connection on the west coast. User friendly website for ordering.
Test Fabrics on the east coast

Keep creating! It's good for the soul.

A study in Color

My daughter Nina and Laura Wasilowski in the Artfabrik booth at the Greater Chicago Quilt Festival show. I love the contrast of Nina and Laura dressed in black and white against the riot of vibrant color in the Artfabrik booth.

Sadly it looks like this was the last year for the Mancuso's to host a show in the Chicago area. They had committed to three years here and the turn out has never been that great at this show. It has never seen the numbers that the International Quilt Festival pulls in their spring show.

I think the economy may have had a significant effect on the show this year, it must have been very rough on many of the vendors. One thing we as quilt show attendees need to remember is that if we don't support these vendors and shows they won't be around for any of us to enjoy in the future. It is hard to find that balance between cutting back to save money and helping small businesses survive through times like these, but we need to find a way to support each other.

Saturday, November 15, 2008

Painted Peltex Pod Form

Stitched painted Peltex, embossed aluminum and wool felt.

I was curious what the surface of Peltex would look like painted. This is the non fusible kind.
I painted one side green and the other side purple, orange and metallic gold with textile paints.The surface came out slightly porous looking, not smooth and flat like painting lutradur or fabric, it has an interesting texture.

I cut shapes out of the Petex for the center of the pod and stitched free motion designs into it. The stitching does not stand out too much on the textured surface.

I cut outside leaves from fabric I had painted a while ago and fused it to wool felt, quilting leaf designs and finishing the edges with a satin stitch. I cut strips of aluminum and stitched it on the leaves and embossed it with free hand drawn designs. The metal helps the leaves hold a curved shape

I stitched some furry novelty yarn to the tops edges of the peltex and then satin stitched the sides leaving the top open.

Kind of reminds me of Little Shop of Horrors in this photo.

I fused a base to the leaves and stitched the leaf edges together through the lower sides of the center pod connecting the whole thing together.

Monday, November 10, 2008

SOFA Chicago

On Thursday I got a call from my friend Trish Williams who invited me to go with her to the preview night at SOFA. (Sculpture Objects & Functional Art) Wow, what an offer: great company, fantastic art, free wine and appetizers... how could I refuse? I love going to the SOFA show, there is so much incredibly inspiring art in so many different mediums. Here are just a few of my favorite artists:

Steffen Dam- This artist makes these incredible scientific looking specimens in glass, often looking like botanical or sea creature forms. This collection looked like jars of jelly fish, I LOVE jellies!

Barbara lee-Smith- beautiful quilt-like imagery which I think is painted and fused lutradur with stitching. Breathtakingly beautiful landscapes.Karen Halt - these are small dresses made from muslin with graphite drawings on them. The finished dresses are coated in beeswax making them hold their shape. Ms Halt often has paintings accompanying these dress forms with imagery that relates to the garment usually including animals like monkeys, birds and squirrels.
Geoffrey Gorman (left) an artist that makes animal sculptures capturing life like movement from driftwood, canvas and found objects. Woodrow Nash (right) makes beautiful life size African figures from clay with beautiful patinas and designs.
J Paul Fennell (left)- exquisitely carved wood forms. Dennis Lee Mitchell (right)- incredibly realistic tree and bark sculpture made from welded clay.
On Sunday I went back for a second viewing with my son, who I knew would appreciate many of the sculptural forms in the show and a live glass blowing demonstration. I am so glad I went a second time because I saw pieces I had missed on thursday night when it was more crowded.

Thursday, November 06, 2008

Surviving the Runway

The highlight of Make it U has got to be Pokeys version of Project Runway that happens saturday at 5 pm. This is an event not to be missed. This time the theme was music of the 80's. Pokey handed out old albums to participants to use as the major component in a wearable item.
Dancing is a large part of project runway, everyone here is doing the Electric Slide.
Tonya Littman, Kathy York and Jamie Fingal at work. In order to get supplies to make your project you need to work for it, this includes, you guessed it, dancing.

I made the mistake of telling Kathy all she needed was some gel for her bangs to get into the true 80's fashion of mall bangs. She looked me in the eye, looked down at her plate of paint and dipped her fingers in GEL MEDIUM and put it in her hair! Dedication!
Turn up the volume for this.

Robbi Eklow who was standing next to me mentioned the movie "Something about Mary" and we all lost it.
Co-judge Robbi Eklow and Lesley Riley standing in for Tim Gunn.
One last wardrobe check.
Working the runway: Deb Boschert , Jamie Fingal and Kathy York.
Honorable Mention, 3rd place, 2nd place and the winner.

Make it University Houston

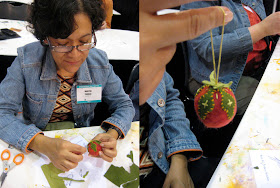
I started my day on saturday with another workshop in Make it U. These ornaments were the perfect size project to do in a one hour workshop. Here's a couple of really cute ornaments that came out of day two.
Kristin and I took many pictures of each other over the course of festival and here is Jan manning the Fiber on a Whim booth. They played the part of adoring fans hooting and hollering whenever Pokey introduced me for a workshop. How can you not love people who make you feel so special.Frances' second day in Open Studios showed her colorful bags of beads and doodads that she stitches on her heavily embellished pieces. Those are whole bags full of single colors of fun stuff Frances picks up on her travels.

Wednesday, November 05, 2008

More quilt show fun: Halloween

How cool to start my friday by meeting mixed media artist Katie Kendricks. Not only a wonderful artist but obviously an incredible teacher when you see the student work coming out of her classes. Katie was just finishing up her time in open studios when I came to setup for my session.
My next thrill was meeting Rice Freeman-Zachery author of the book Living the Creative Life. Rice is writing another book on creativity and I am so honored to be amongst the wonderful artists she has chosen to include in her book.
The lovely and glamorous witches Leslie and Jamie posed for a Halloween picture.
Here's Frances Holliday Alford working across from me on her wreaths.
A little glimpse of the wall in the open studios area; Frances' piece is right below the colors sign, my sister Deb Silva's is below Frances' and one of mine in on the right, the other one on the far left of the same row with the three flowers.After I finished Open Studios I taught my workshop on stitched felted wool ornaments. This is Make it University with the Quilting Arts booth in the background
and the other side of the workshop area, with Fiber on a Whim in the background.It was wonderful meeting blog visitor, Martha from Austin, beautiful ornament!
Everyone made wonderful ornaments, I wish I had better pictures of many of them, unfortunately my camera often focused on the background.

Look how cute Jane Davila, Barb Delaney from Quilting Arts and Pokey Bolton were.
Friday night at the Quilt Art reception we realized many of us also love apples.
Me, Robbi Eklow, Lesley Riley, Pokey